接着上一部分,在这个部分主要是添加网页相关的一些内容.
对应的源码也放在了github仓库中mysite-part3
开始
概述
在我们的polls的应用中,我们需要以下的四个视图:
- Question的index页面—显示最近的问题
- Question的detail页面—显示一个问题的详细信息,可以投票
- Question的results页面—显示一个问题的结果
- 投票功能—能够处理投票信息
视图
在Django中,每一个视图都是由一个函数来处理的,简单来说,在正则表达式匹配到相应的链接之后,会将处理的信息交给对应的视图的函数来处理这一请求.
在django中的参数传递使用的是简单的URL形式,如: /newsarchive/<year>/<month>(后面的两个URL的地址将会以值的方式传递进入视图)
创建视图
我们在polls/views.py文件中创建以下几个简单的view:
def detail(request, question_id):
    return HttpResponse("You're looking at question %s." % question_id)


def results(request, question_id):
    response = "You're looking at the results of question %s."
    return HttpResponse(response % question_id)


def vote(request, question_id):
return HttpResponse("You're voting on question %s." % question_id)然后我们需要在polls/urls.py中匹配相对应的视图到网页中:
from django.conf.urls import url
from . import views
urlpatterns = [
    url(r'^$', views.index, name='index'),
    url(r'^(?P<question_id>[0-9]+)/$', views.detail, name='detail'),
    url(r'^(?P<question_id>[0-9]+)/results/$', views.results, name='results'),
    url(r'^(?P<question_id>[0-9]+)/vote/$', views.vote, name='vote'),
]
接下来就可以在浏览器里对上面的几个url进行访问了.
在view中对数据库进行操作
让我们对index函数进行一些修改,让其显示最近的5条question.
from django.http import HttpResponse
from .models import Question


def index(request):
    latest_question_list = Question.objects.order_by('-pub_date')[:5]
    output = ', '.join([q.question_text for q in latest_question_list])
    return HttpResponse(output)
# 下面是之前写的代码,不需要更改
这样就可以在网页上看到前5条question信息了,但是这样在网页上的显示效果不是很好.
添加网页
在django中,网页通常存放在template文件夹中,但是在项目生成的时候并不存在这一文件夹,所以需要我们自己在polls文件夹中新建一个template文件夹,django会自动扫描这个文件夹下面的文件.
然后我们在template的文件夹下,再创建一个polls文件夹,然后在里面创建一个index.html文件.在里面写如下的代码:
{ % if latest_question_list % }
    <ul>
    { % for question in latest_question_list % }
        <li><a href="/polls/{'{ question.id }' }/">{'{            question.question_text }' }</a></li>
        { % endfor % }
        </ul>
{ % else % }
<p>No polls are available.</p>
{ % endif % }
然后我们要更新index函数让它使用我们的template:
from django.http import HttpResponse
from django.template import loader
from .models import Question
def index(request):
latest_question_list = Question.objects.order_by('-pub_date')[:5]
template = loader.get_template('polls/index.html')
context = {
'latest_question_list': latest_question_list,
}
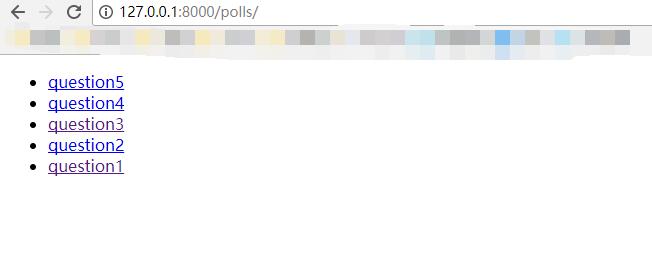
return HttpResponse(template.render(context, request))在网页中的运行效果如下:
一种简单的写法
对于HttpResponse的请求过于常见,所以django提供了一个更简单的方式来返回HttpResponse请求.我们可以改写index()函数如下:
from django.shortcuts import render
from .models import Question


def index(request):
    latest_question_list = Question.objects.order_by('-pub_date')[:5]
    context = {'latest_question_list': latest_question_list}
    return render(request, 'polls/index.html', context)
相对于上面的写法来说,这样的方法确实简单了不少.
处理404错误
在polls/views.py中修改detail文件如下:
def detail(request, question_id):
    try:
        question = Question.objects.get(pk=question_id)
    except Question.DoesNotExist:
        raise Http404("Question does not exist")
    return render(request, 'polls/detail.html', {'question': question})
在这里,如果查询的id不存在,就会产生一个404错误.
然后我们需要创建一个detail的html页面:
{'{ question }' }
一种简单的写法
可以使用**get_object_or_404()**函数来处理Http404信息.代码如下:
def detail(request, question_id):
    question = get_object_or_404(Question, pk=question_id)
    return render(request, 'polls/detail.html', {'question': question})
使用template
让我们将detail.html修改成下方的代码:
<h1>{'{ question.question_text }' }</h1>
<ul>
    { % for choice in question.choice_set.all % }
        <li>{'{ choice.choice_text }' }</li>
    { % endfor % }
</ul>在这个模板中,我们使用了question.question_text这个变量,使用{‘{ }’ }来获取这个对象属性.
在这里我们还用到了{ % for % }{ % endfor % }这个for循环的模板,用来遍历里面的信息.
移除template中的URL硬编码
我们在index.html中写的链接形式如下:
<li><a href="/polls/{'{ question.id }' }/">{'{ question.question_text }' }</a></li>
在这里,问题就是我们使用了硬编码,将url在页面中写死了,这对以后的修改维护是一个很大的问题.所以我们可以将li标签改写成如下的形式:
<li><a href="{ % url 'detail' question.id % }">{'{ question.question_text }' }</a></li>
这样做我们就在url中匹配了name为detail的url地址:
url(r'^(?P<question_id>[0-9]+)/$', views.detail, name='detail'),
URL的命名空间
现在我们的项目中只有polls这一个app,如果在一个大的项目中,不止一个app的话,里面的urlname很容易冲突,这时候我们可以在urls.py文件的开头加上app_name这一个属性,这样就可以解决命名冲突的问题,我们可以以如下的方式来访问到这个url:
<li><a href="{ % url 'polls:detail' question.id % }">{'{ question.question_text }' }</a></li>
在这个项目中,我们仍旧可以以之前的方法来访问不需要做修改.
总结
这一个部分中,主要是学习了一些django中的模板方法,如render(),get_object_or_404()之类的,还有html页面中template的使用,总体来说是非常的简单的.最后是关于url命名空间和解决硬编码问题的一些东西.